Circular Saw Curved Cuts in Plywood: Jigs & Setup
By Benji O’Sullivan • 2nd May
Circular saw curved cuts in plywood don't require expensive track saws or years of experience, they demand setup discipline and a jig that removes guesswork. When you control the variables before the blade touches wood, clean, repeatable curves follow.
Most people assume curved cutting is inherently risky or imprecise. It isn't. I learned this teaching a small group where everyone started frustrated. Two blamed their saws for wandering cuts. One thought her blade was dull. After we squared the base plate, set the depth correctly, clamped a guide rig tight, and marked our radius consistently, all three cut arcs that looked shop quality. The confidence shift was immediate. They weren't better; the setup was better. Square starts at the setup, and that principle holds for radius cuts just as much as crosscuts.
Why Curved Cuts Intimidate (But Don't Have To)
Curved cutting feels different because you're fighting geometry and tool rigidity at once. Your blade wants to drift left or right as it follows a radius. A shallow cut setup or loose clamp turns that drift into a wobble. Splintering and binding follow. If you're deciding between tools, our circular saw vs jigsaw guide explains when each shines for curves. But splintering and binding are not your fault (they are symptoms of incomplete prep).
The good news: Curved cuts with a circular saw become predictable once you separate the three jobs, marking accuracy, depth control, and rigid workholding. Do those three things, and the saw does the rest.
Blade Selection for Curved Plywood Cuts
A straight blade won't curve well. You need a fine tooth blade, something in the 40-80 tooth range with a thin kerf. More teeth mean slower feed, but they also mean less splintering and less aggressive binding. For cleaner edges, see these tear-out prevention techniques. On plywood, a combo blade or general purpose blade works fine for curves because the thin kerf reduces side pressure, letting your guiding jig steer without fighting the blade.
Tooth geometry matters less for curves than for straight rips. What matters is that your blade sits flush on the circular saw jig, with no rock or play. If the blade mount has any flex, your curve will wander.
The Foundation: Understanding Your Setup
Before you build a jig, know your saw. The blade should be set to cut 1/4" deeper than your material thickness. For 3/4" plywood, that's roughly 1" blade depth. Anything deeper increases binding risk; anything shallower lets the saw wander and burn. This single detail (depth) shapes everything that follows. Dial it in with our blade depth setting guide for different materials.
Check your base plate against a square. A crooked base creates beveled cuts even with perfect guides. If it's not square, adjust the base plate screws until it is. This takes five minutes and prevents hours of frustration.
Building Your DIY Curved Cut Jig
You don't need a $200 accessory. For more options, explore our curved cut jigs and radius guides you can build or buy. A DIY circular saw jig for curves is simple: a template and a follower bearing, or a clamped straightedge adapted to curve, or even a trammel arm for repeatable radii.
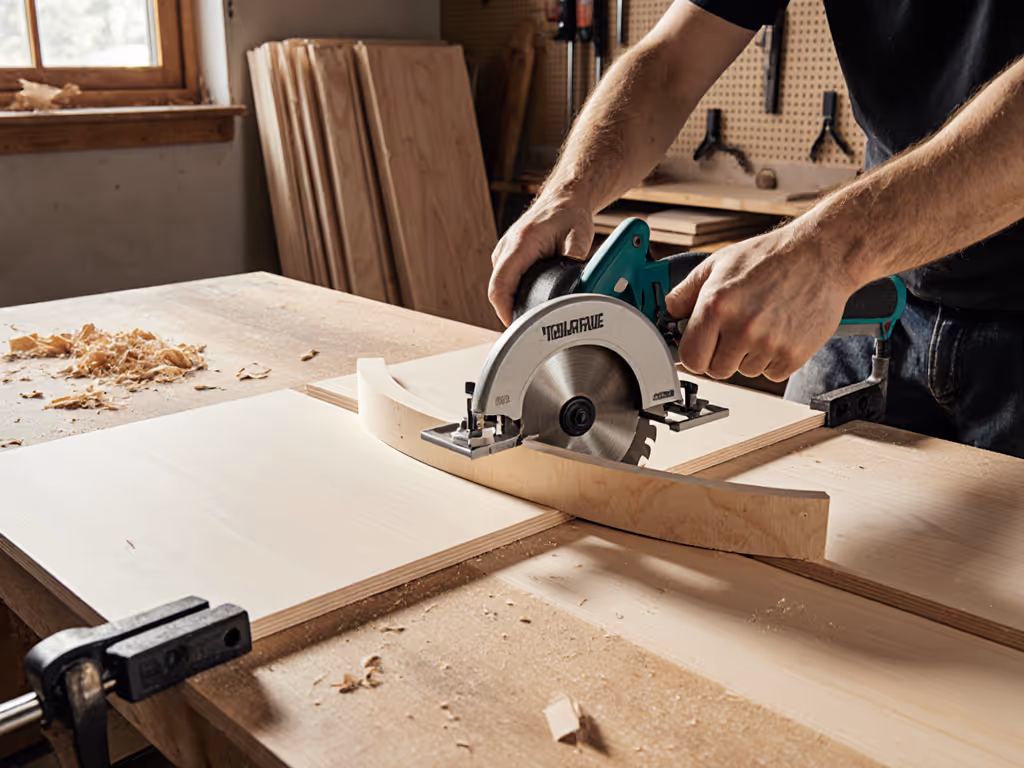
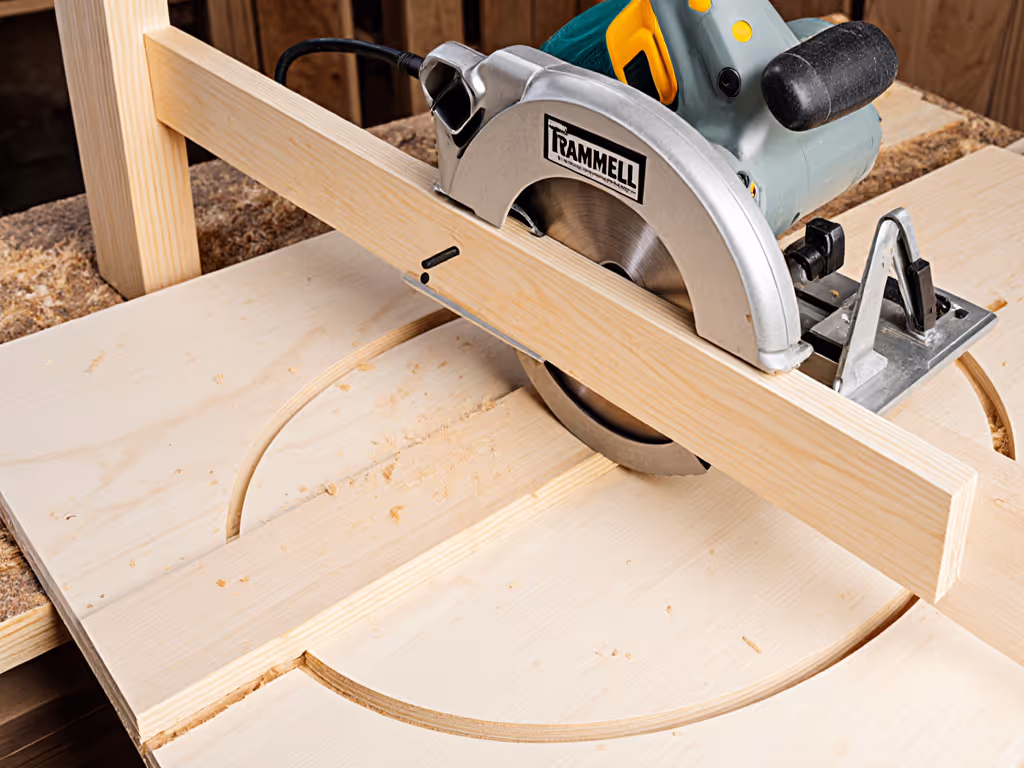
Simple Trammel Arm for Radius Curves
The easiest curved cut jig uses a pivot point:
- Mark your radius point on the plywood, where the arc will pivot.
- Create an arm from straight stock (a 1x2 or aluminum angle works). Drill one hole at your pivot point, another hole sized to fit your saw's guide shoe or a rigid block clamped to your baseplate.
- Position the saw so the blade aligns with your marked arc.
- Clamp or pin the arm to the plywood at the pivot.
- Rotate the saw slowly around the pivot, feeding at a steady pace.
This method gives you clean radius cuts for bowl edges, tabletops, or decorative curves.
Template and Follower Method
For complex curves (not perfect circles), use a template:
- Cut or rout a master shape in hardboard or plywood, your intended curve.
- Clamp the template flush to your workpiece.
- Attach a follower bearing to your baseplate (a smooth wheel that rides the template edge).
- Run the saw with the bearing pressed against the template. The blade follows the same line.
This takes more prep but produces identical results on multiple pieces.
Your Curved Cutting Checklist
Before you power on, run through this:
Mark and Clamp
- Lightly pencil your intended curve on the plywood (sharp pencil, not thick carpenter's pencil; thick lines introduce 1/8" errors)
- Clamp your jig (trammel arm, template, or straightedge) firmly in place. Position clamps every 24" to prevent flex
- Use C clamps with throat depth matching your material thickness. Quick grip clamps often lack holding power for long cuts
Saw Setup
- Check your base plate is square using a combination square
- Set blade depth 1/4" deeper than material thickness
- Install your blade with teeth pointing forward, and tighten the arbor nut per manufacturer specs (typically 15-20 foot pounds)
- Verify the blade is clear of the jig before starting
Safety and Support
- Wear safety glasses with side shields, chips travel at 100+ mph
- Wear hearing protection (saw noise runs 95+ decibels)
- Lay the plywood on a foam support sheet to protect the underside and provide a safe backstop for the blade
- Use dust collection or an N95 mask if cutting indoors
Ready to Cut
- Start the saw at full speed (2-3 seconds) before the blade contacts the plywood
- Never start with the blade touching wood, this causes kickback
- Feed at a steady, confident pace, don't force or hesitate
Cutting the Curve: Step by Step
- Position yourself for visibility and control. You should see both the blade and your marked line.
- Start away from the curve if possible. Make a straight approach cut first, then transition into the radius. This gives the blade room to settle.
- Feed steadily and let the jig guide you. Don't grip tightly or muscle the saw. The jig does the steering; you provide consistent forward pressure.
- Listen to the motor. If it bogs or slows, you're feeding too fast. Ease back and let the blade catch up. If the blade sounds angry or catches, stop immediately, turn off the saw, and clear any binding.
- As you near the end of the curve, slow slightly to avoid tear out at the exit point. Some people place a backer block beyond the cut line to control the break through.
- Inspect immediately. Look for splintering, burn marks, or drift. If the curve drifted off your line, the issue is usually loose clamping or a baseplate that isn't square, not the blade.
Error Traps: What Goes Wrong and Why
Wandering cuts. Your jig was loose, or your baseplate was crooked. Re clamp harder. Check for square.
Splintering and tear out. Your blade is dull or too coarse, or your feed rate is too fast. Slow down. Use a finer blade. A sharp, fine tooth blade cuts plywood cleanly.
Burning or discoloration. Blade depth is too shallow, or you're not feeding at all. Reset depth 1/4" deeper than material. Maintain steady forward pressure.
Kickback or binding. Your saw hit a knot or hardened spot in the ply. This happens. Stop, back up slowly, and approach the same line from a slightly different angle. If it happens repeatedly, your feed rate is too slow, let the saw work. For a deeper safety primer, read circular saw kickback prevention.
Plywood Curve Cutting Techniques: Avoid These Shortcuts
Don't skip clamping because you "just need to hold it steady with your knee." Plywood is heavy and sags. Sag causes the blade to wander. Clamp it.
Don't use a dull blade to save time. A dull blade forces slower feed, which burns, which looks ugly, which you then have to sand, which takes longer than buying a sharp blade.
Don't assume all guides are universal. Test your jig on scrap before moving to your finished workpiece. A five minute test cut on plywood offcuts saves expensive mistakes.
Next Steps: Start With One Simple Curve
Pick a project that uses one radius, a shelf edge, a tabletop, a box lid. Mark your curve, build or buy a trammel jig, work through the checklist, and cut one test piece. Clamp tight, stay square, feed steady. When that curve comes out clean, you've proven to yourself that setup beats bravado every time.
The confidence you'll gain, that's the real win. Curved cuts aren't magic. They're just straight cuts on a different path, and square starts at the setup.
Related Articles