
Circular Saw Safety: Prevent Kickbacks Now
By Benji O’Sullivan • 3rd Oct
If you've ever flinched when your circular power saw grabs wood unexpectedly, you're not alone. Nearly 30,000 people land in hospitals yearly from circular saw injuries, many due to preventable kickbacks. The truth is, safe circular saw operation isn't about muscle or reflexes; it's about repeatable systems. I've watched countless beginners blame their tools until we fixed the setup. Square starts at the setup, and once we squared the shoe, set the depth, and clamped a straightedge? Every cut improved. No magic tricks, just predictable steps that turn anxiety into confidence.
The 7-Step Kickback Prevention Checklist
Here's your field-tested sequence for cuts that stay under control. Follow these steps in order (no skipping), and you'll neutralize the top causes of kickback.
Step 1: Gear Up Before You Grip
Your safety gear isn't optional, it is your first line of defense. Skip this, and you're gambling with high-speed steel. Do this every time, even for "quick" cuts:
- Eye protection: Sawdust and splinters fly sideways. I learned this the hard way after a pine shaving stung my cheek for hours.
- Hearing protection: Circular saws hit 100+ decibels, enough to cause permanent damage in 15 minutes.
- Dust mask: Silica in wood dust harms your lungs long-term (OSHA now requires N95 masks for indoor cutting).
- Clothing check: Roll sleeves, tuck shirts, and secure long hair. Loose fabric can snag the blade guard as it retracts.
Remember: Kickbacks happen in 0.3 seconds. Your saw safety gear won't stop a blade, but it might save your vision or eardrums when things go sideways.
Step 2: Scout Your Workspace Like a Pro
Most kickbacks start before you pull the trigger. Five minutes of prep avoids disaster:
- Clear tripping hazards: Move cords, tools, and lumber scraps from your cutting path. Overreaching causes 40% of kickbacks (per OSHA field reports).
- Check your footing: Stand balanced with feet shoulder-width apart, never lean across the cut line.
- Inspect the wood: Run your hand over both sides. Hidden nails or knots can deflect the blade violently.
- Manage the cord: For corded saws, drape it behind you so it won't snare in cut-off pieces.
This is where workshop safety tips become non-negotiable. I've seen DIYers cut near doorways where kids might walk through, always designate a "cut zone" with no bystanders.
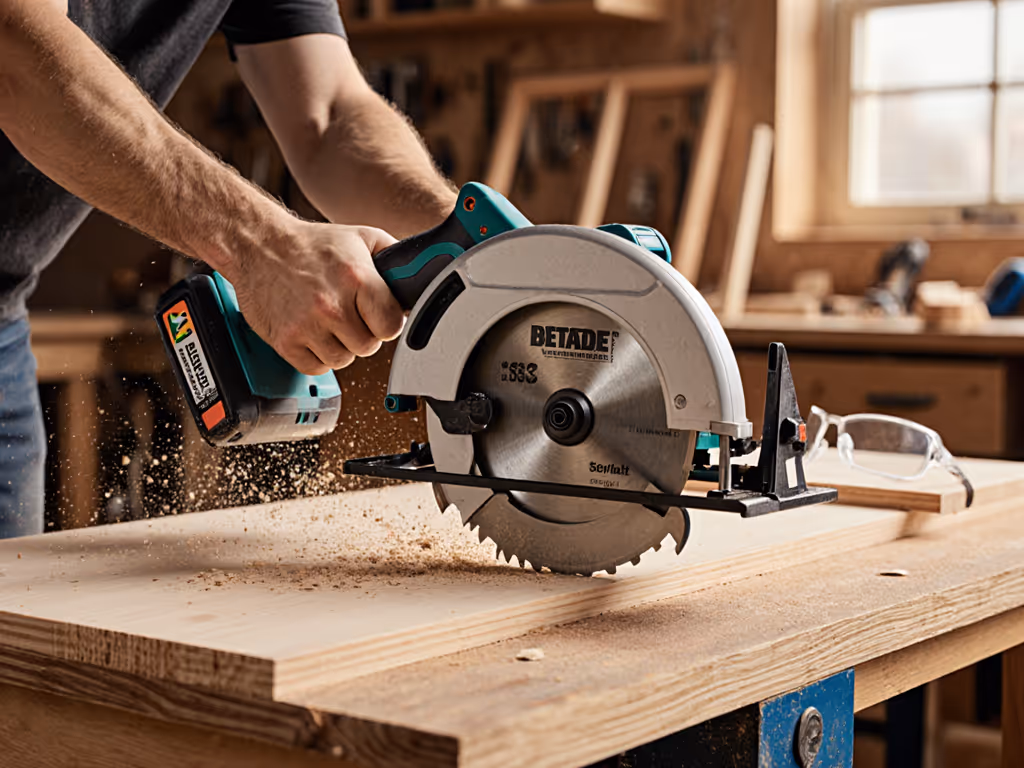
Step 3: Inspect Your Saw & Blade (Don't Skip This!)
A malfunctioning saw turns safe cuts dangerous. Verify these before plugging in:
- Blade sharpness: Dull teeth crush wood instead of slicing it, increasing friction and kickback risk. Run your fingernail perpendicular to teeth; if it snags, sharpen or replace.
- Guard movement: The lower guard must snap back fast. If it sticks open (a common hack I've seen), stop using it, this is how fingers meet blades.
- Shoe alignment: Loosen the clamp bolt, place the saw on a true straightedge, and square it. A 1/16 inch misalignment wanders fast in long cuts.

DEWALT 7-1/4" Corded Circular Saw (DWE575SB)
Lightweight 15-amp saw for precise, powerful cuts with less fatigue.
$176.7
Weight8.8 lbs (Lightest In Class)
Weight8.8 lbs (Lightest In Class)
Pros
Effortless, precise cuts—'like butter' through wood.
Powerful 15-amp motor prevents bogging down.
Integrated dust blower for clear sightlines.
Cons
Corded operation limits mobility for some users.
Customers find this circular saw to be better than other models, praising its lightweight design that reduces fatigue during use. Moreover, the saw performs well in the field with precise cuts, and one customer notes it cuts through wood like butter. Additionally, they appreciate its solid construction with heavy-duty cord, powerful motor, and good value for money. Customers also find it easy to use, with one mentioning it handles projects as well as a 3HP table saw.
Customers find this circular saw to be better than other models, praising its lightweight design that reduces fatigue during use. Moreover, the saw performs well in the field with precise cuts, and one customer notes it cuts through wood like butter. Additionally, they appreciate its solid construction with heavy-duty cord, powerful motor, and good value for money. Customers also find it easy to use, with one mentioning it handles projects as well as a 3HP table saw.
Example: The DEWALT DWE575SB's ball-bearing guard ensures smooth retraction, while its aluminum base resists flex. But even great tools need checks, I've had new saws with loose shoe bolts right out of the box.
Step 4: Support Your Workpiece Like Your Fingers Depend On It
This is the #1 kickback killer. Unsupported wood closes the kerf and traps the blade. Do this:
- Clamp small pieces (<24 inches) to a sturdy workbench. Never hold them by hand.
- Use sawhorses for sheets: Place one under the cut line and another 6 inches from the far edge. Sagging = binding.
- Add a "kicker" block for long rips: Clamp a 2x4 along your cut line as a guide. This stops off-cuts from pinching the blade.
When I taught that Saturday class, three students had binding issues from unsupported plywood. After clamping their sheets? Not one kickback. Good setup beats bravado.
Step 5: Set Depth Properly (No Exceptions)
Most beginners set depth too deep, exposing unnecessary blade. This creates two risks: more kickback surface and harder blade stopping. Do this:
- Unplug the saw.
- Lower the blade until teeth poke through the wood by no more than 1/4 inch.
- Tighten the depth lever securely.
Why? Less exposed blade = less chance for the back teeth to grab wood and rocket the saw backward. This simple step is core to circular saw accident prevention, yet 60% of DIYers ignore it (per Power Tool Institute surveys).
Step 6: Execute the Cut in This Sequence
Kickbacks often happen in the first 6 inches. Follow this exact sequence: For a step-by-step beginner routine, see our kickback-safe first cuts guide.
- Position first: Place the front of the shoe flat on the wood, away from the cut line.
- Start the motor: Let it reach full speed before touching the wood.
- Guide, don't push: Rest the saw's rear handle against your hip for stability. Feed wood into the blade at a steady pace, never force it.
- Watch your line: Keep your eye on the front shoe notch, not the blade. Your body will naturally follow your gaze.
Key insight: If the blade binds, ease off the trigger and back out slowly. Forcing it guarantees kickback.
Step 7: Shutdown Protocol
The danger isn't over when the cut ends. Many injuries happen during careless put-downs:
- Wait 10 full seconds after releasing the trigger. Blades spin for 5+ seconds after stopping.
- Place the saw base-down on scrap wood (not your workpiece). Sawdust can keep it running slightly.
- Unplug/change blades only when cool. Heat expands metal, making blade removal risky.
Modern saws like the DEWALT DWE575SB have electric brakes that stop blades in 2 seconds, critical for crowded job sites. But never rely solely on tech; patience is part of the sequence.
Final Thought: Confidence Comes From Checklists
You don't need "saw instincts" to avoid kickbacks, you need a system. My Saturday class proved it: When we fixed the setup, the saws didn't change, but confidence did. Stop guessing. Start with square starts at the setup every time, and kickbacks become rare. Your best safety tool isn't a gadget, it is the repeatable sequence you follow before the first spark flies.
Actionable Next Step: Print this checklist. Tape it to your saw's handle. Run through all 7 steps on your next project, no matter how small. After three cuts, it becomes habit. That's when your saw stops feeling like a threat and starts feeling like a tool.
Related Articles


Circular Saw Maintenance: Dust Control & Blade Longevity Tips
Cut dust at the source and extend blade and motor life with a practical routine: quick pre-use checks, effective cleaning, material-specific blade care, airflow management, light lubrication, and smart storage. Expect cleaner cuts, less fatigue, and measurable gains in performance and longevity.