Safe Classroom Circular Saws: Top Educational Picks
By Benji O’Sullivan • 29th Nov
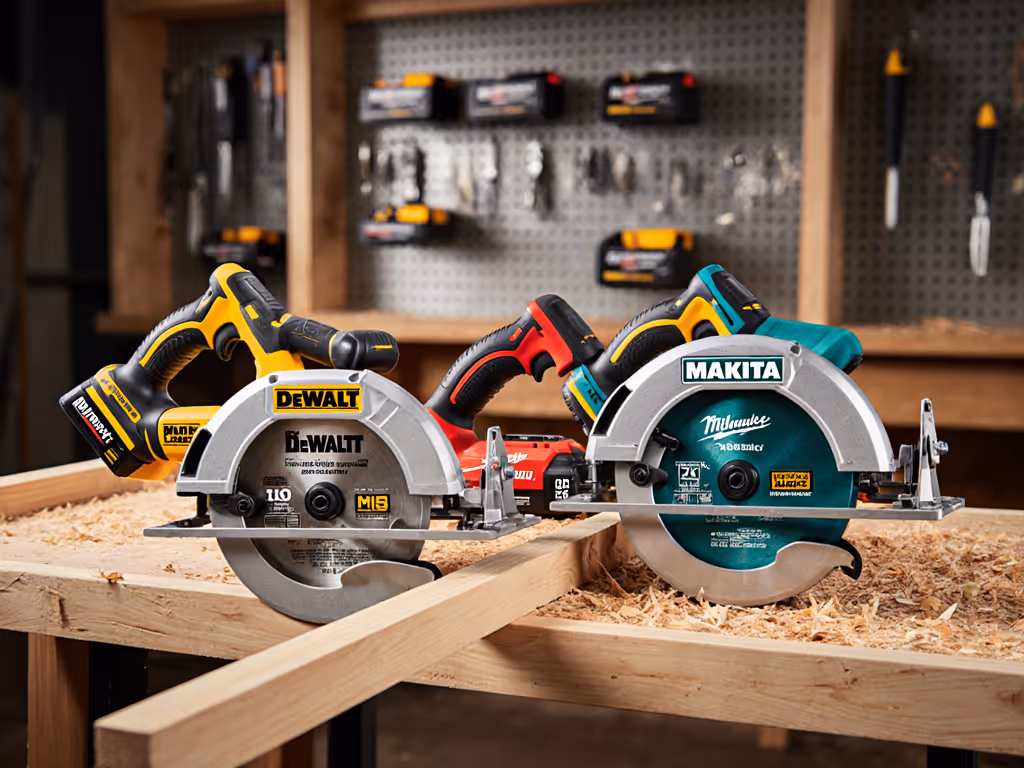
When setting up woodworking programs, selecting the right educational circular saws matters more than raw power. I've seen too many instructors jump straight to flashy features without addressing the fundamental safety and setup requirements that make these classroom power tools actually usable in learning environments. The right saws for schools aren't just scaled-down versions of job-site tools (they are purpose-built with safety, durability, and teachable sequences in mind). In my years teaching woodworking education, I've learned that good setup beats bravado, and repeatable steps beat luck every time.
Teach setup first, and clean, square cuts follow.
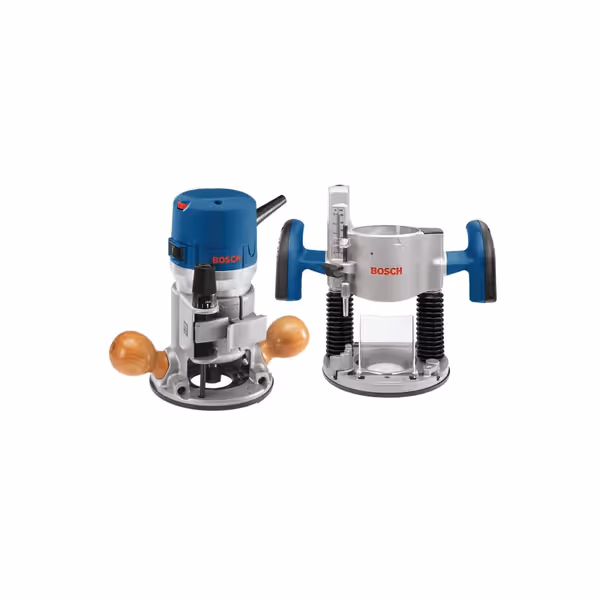
BOSCH 1617EVSPK Router
Powerful, versatile router for precision work and consistent results.
$229
Motor12-Amp, 2.25 HP
Motor12-Amp, 2.25 HP
Pros
Powerful 12-amp motor handles demanding tasks.
Dual base offers plunge and fixed routing versatility.
Microfine depth adjustments for superior accuracy.
Cons
Durability reports are mixed among users.
Customers find the router to be well-built with a rock-solid fixed base and appreciate its incredible power for most projects. The tool is easy to use and handle, with accurate bit height adjustments, and they consider it a great value for the money, offering two routers for the price of one. While the build quality and performance receive positive feedback, opinions about durability are mixed, with some customers reporting it broke within a month of use.
Customers find the router to be well-built with a rock-solid fixed base and appreciate its incredible power for most projects. The tool is easy to use and handle, with accurate bit height adjustments, and they consider it a great value for the money, offering two routers for the price of one. While the build quality and performance receive positive feedback, opinions about durability are mixed, with some customers reporting it broke within a month of use.
Why Standard Circular Saws Don't Belong in Most Classrooms
Before we dive into specific tool recommendations, let's address an uncomfortable truth: BS 4163:2014 regulations state that learners in schools should not use standard circular sawing machines. About 10,600 emergency room visits annually stem from improper circular saw use (most preventable with proper safety protocols). For a comprehensive primer on PPE, workspace setup, and preventing kickback, see our circular saw safety guide. When I started teaching, I too assumed circular saws were classroom staples until I reviewed safety documentation and accident reports.
Here's what most educators miss when selecting saws:
- Guard vulnerabilities: Standard retractable guards often get jammed with dust or deliberately disabled by users seeking better visibility
- Kickback risks: Students lack experience recognizing binding conditions that cause violent kickback
- Power overload: Commercial saws' aggressive cutting characteristics overwhelm beginner motor skills
- Setup complexity: Proper alignment requires skills students haven't yet developed
My Saturday class revelation came when three frustrated students blamed their saws for crooked cuts, until we squared shoes, set proper depth, marked from a story stick, and clamped a straightedge. Watching confidence replace guesswork hooked me on teaching proper sequences first. Good setup creates predictability; no amount of saw power compensates for poor fundamentals.
The 5 Critical Safety Features for Educational Saw Selection
Don't waste budget on features that look good in brochures but won't survive classroom use. Prioritize these non-negotiable elements:
1. Automatic Blade Guard System With Positive Lock
Unlike standard saws where guards get manually manipulated, educational models should feature:
- Spring-loaded guards that automatically return to position after each cut
- Physical lockouts preventing operation with guard disabled
- Transparent guard sections maintaining visibility without compromise
- Dust-sealed mechanisms preventing jamming from sawdust
2. Reduced-RPM Cutting System
Full-power saws spinning at 5,000+ RPM create dangerous kickback scenarios. Educational saws should:
- Operate at 2,800-3,200 RPM for controlled cutting
- Feature electronic brake systems stopping blade within 2 seconds of trigger release
- Include torque-limiting clutches that disengage during binding events
3. Integrated Workpiece Support System
The most common cause of binding? Inadequate work support. Classroom saws need:
- Built-in outriggers for sheet material handling
- Non-slip material retention pads
- Adjustable guide fences that lock securely
- Clearance for clamp placement without obstructing sightlines
4. Simplified Depth and Bevel Controls
Complex adjustment mechanisms lead to errors. Look for: Before introducing students to these controls, review our depth and bevel setup guide for safe, repeatable adjustments.
- Large, tactile adjustment knobs requiring no tools
- Clear visual indicators with locking levers
- Limited bevel range (0°-45° only) preventing dangerous compound cuts
- Positive stops at common angles
5. Dust Collection Integration
Health regulations increasingly require airborne particle control. Essential features include:
- Standard 1¼" or 1½" dust ports compatible with school vacuums
- Sealed motor housings protecting electrical components
- Channeling systems directing debris away from cutting zone
Remember: No saw makes up for poor setup. A $100 saw used properly outperforms a $400 saw used incorrectly every time.
Top 3 Educational Circular Saw Alternatives (And When to Use Them)
Given safety regulations restricting student use of traditional circular saws, these alternatives provide safer pathways to teach cutting principles:
1. Panel Saws With Fixed Blades (Teacher-Operated)
Best for: Teachers cutting sheet materials for student projects
These wall-mounted systems keep dangerous blades stationary while material moves:
- Why they work: Blades remain completely enclosed except at cutting point
- Key benefit: Students learn measurement and setup without direct blade exposure
- Setup sequence:
- Verify dust collection connection
- Check blade guard operation
- Set fence using factory-calibrated stops
- Perform test cut on scrap
- Repeat the sequence for each new material type
2. Benchtop Track Saws With Safety Interlocks
Best for: Supervised student use on pre-marked cuts
Track-guided systems eliminate wandering blades while adding multiple safety layers: For choosing between full track systems and straight-edge solutions, see our track saw vs. rip guides.
- Why they work: The track physically prevents hand entry into cutting zone
- Key benefit: Students focus on steady feed rate without steering concerns
- Setup sequence:
- Secure track with included clamps
- Verify dust extraction connection
- Pre-set depth using material-specific gauge
- Position material with 6" overhang minimum
- Repeat the sequence for each cut series
3. Router-Based Cutting Systems (The Safe Alternative)
Best for: Precision cuts on smaller workpieces with direct supervision
This brings us to the Bosch 1617EVSPK combination router system (a remarkably versatile alternative to circular saws for classroom applications). While not a circular saw, its plunge base functionality with appropriate guide rails creates safer cutting options for educational settings.
- Why it works: The router's lower RPM (8,000-25,000 vs. circular saw's 5,000+) creates less dangerous kickback scenarios
- Key benefit: The dust-sealed power switch and Constant Response Circuitry maintain consistent cutting without bogging
- Setup sequence:
- Install straight-cutting bit with 1/2" shank
- Mount plunge base to guide rail system
- Set depth using microfine adjustment
- Secure workpiece with dual clamps
- Position dust collection hose
- Repeat the sequence for each cut
The Bosch 1617EVSPK's advantage in classroom settings comes from its Precision Centering Design, which keeps the bit perfectly aligned with the guide rail. Students mark first, clamp securely, and follow the guide, creating predictable results without direct blade exposure. The rounded hardwood handles maximize control during plunge operations, while the dust-sealed power switch prevents malfunctions in dusty workshop environments.
Unlike aggressive circular saws, this router system operates at user-controlled speeds appropriate for different materials, reducing splintering on plywood and melamine while maintaining safety. The microfine bit-depth adjustment allows precise control down to 1/64", teaching students the importance of incremental adjustments.
The Non-Tool Essentials: Your Classroom Safety Sequence
No saw selection matters without proper protocols. Implement this mandatory sequence before any cutting activity:
Teacher Preparation Sequence
- Verify tool condition: Check guards, switches, and cords before each use
- Confirm PPE availability: Safety glasses, hearing protection, and dust masks must be present
- Set up work area: Clear 6-foot radius around cutting zone
- Demonstrate proper stance: Feet shoulder-width, dominant hand on handle, non-dominant hand clear
- Review emergency stop procedure: Show exact location and operation
Student Setup Sequence
- Mark cut lines: Use story sticks, not tape measures
- Clamp work securely: Two points minimum, never holding by hand
- Check alignment: Sight along guide before starting
- Position body: Stand to side, never directly behind cut line
- Perform test pass: Dry run without power to confirm path
This sequence creates muscle memory that transfers to future tool use. When students follow these steps consistently, their confidence grows, not from the tool's power, but from knowing exactly what comes next.
Your Action Plan for Safer Classroom Cutting
Don't wait for an incident to review your cutting protocols. Take these three steps this week:
- Audit your current saws: Check if guards function properly and meet BS 4163:2014 standards
- Schedule a safety sequence drill: Practice the student setup sequence without power
- Request an equipment review: Contact your district's safety officer about approved educational saw models If you’re evaluating options for a first classroom tool, start with our beginner buying guide to avoid common mistakes.
The best classroom saw isn't the most powerful (it is the one that creates the most predictable learning outcomes). When you teach setup first, clean, square cuts follow. And when students understand that repeatable processes beat random attempts, they carry that confidence into every future project.
Educational woodworking shouldn't be about managing risk: it should be about building competence through structured sequences. Grab your story stick, square your shoes, and repeat the sequence. That's how you turn anxious beginners into confident makers.
Related Articles